

Voice Memos, Apple’s audio recording application, goes far beyond the simple voice recorder. Here’s how to make the most of what can be the most overlooked Apple application on your iPhone or iPad.
Voice notes are not applications that most people think a lot, but that doesn’t mean it doesn’t cost. Between layered recordings, its own transcripts and the overall ease of use, it is easy to understand why Apple has integrated it into most of its devices.
Let’s take a look at how voice notes appeared and how you can get the most out of it.
The relationship between image and sound
It is not possible to talk about the history of the recorded sound without discussing the history of recorded pictures. Arguabury, it is unlikely that we should follow how to record the sound when we did it if we shouldn’t be how to record images first.
While people have long known that light plays a major role in displaying images, until the beginning of the 18th century inventors have discovered a way to permanently record images. In 1822, the French inventor NicePhore Niepce used a photoresist, a type of light medium, to create the first permanent recorded image.
The first paintings of Daguerreotype were created in 1839 and widely used in the 40s and 50s of the 20th century. This meant the beginning of what would become known as photography, a combination of Greek words photo, Which means light and Graphos, Which means drawing.
Because these early photographers walked, the French printer and later inventor Edouard-Leon Scott de Martinville later ran at least.
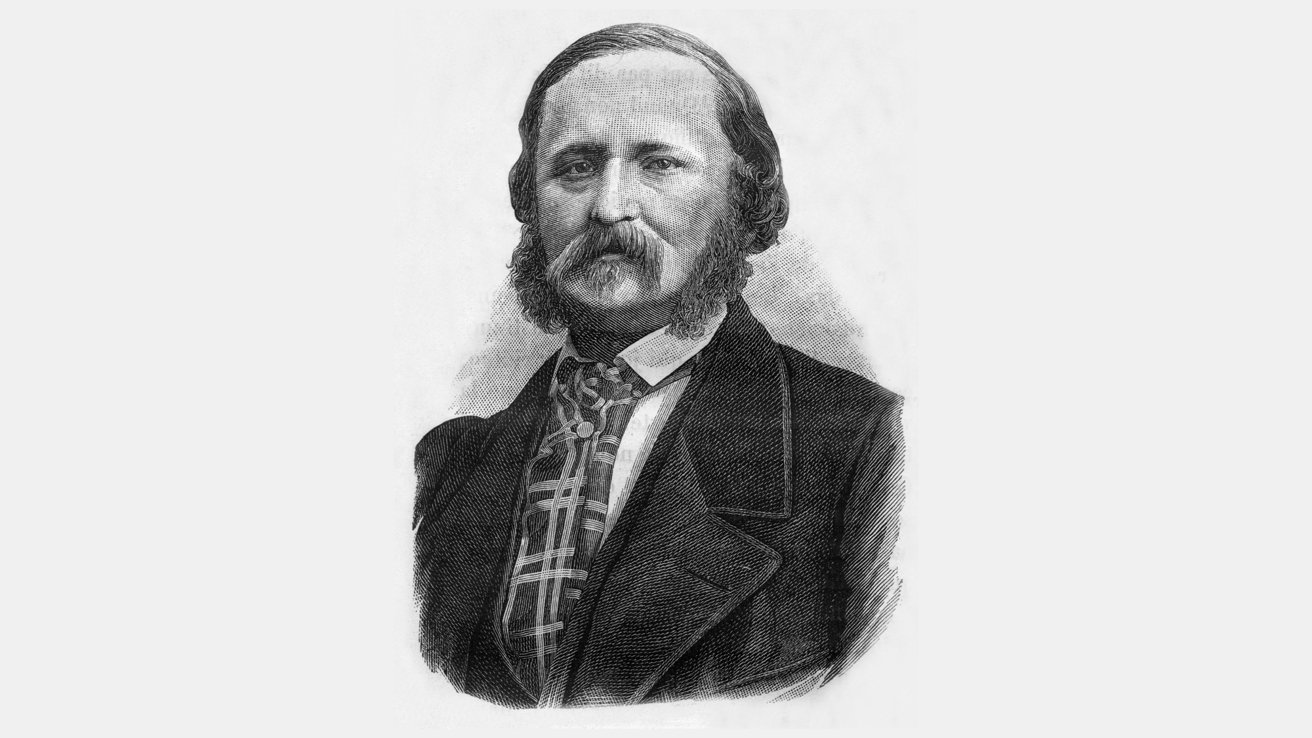
Edouard-Leon Scott de Martinville
Initially, Scott de Martinville failed to create a sound that could be played, but rather a sound that could be visual. As a printer, he was very interested in the printed word and wanted to create something similar to a transcription in which a sound that could be repeated and then “read” back.
He thought it could be used for stenographic purposes, as a way to record conversations quickly and automatically without having to manually record it. As historian David Giovannoni informed TimeScott probably didn’t even think that sound was possible.
However, Scott de Martinville recorded the first sound in 1857.
If you were curious, in 2008, scientists from Lawrence Berkley National Laboratory managed to turn this first recorded sound into playable sound. He was a man, probably Scott of Martinville, and sang an excerpt from the French folk song “In The Moon Clair”. You can listen to it here.
Recording sound for listening
While people were unable to read the resulting ascent, it didn’t take long before someone realized the machines Could. In fact, it would only take about two decades.
In 1877 Thomas Edison patented a phonographic cylinder that made it possible to record and play the sound. Edison’s war used tin foil, but less than ten years later the wax war would be interested. In 1910, phonographic records, which are still produced to this day, were captured in their place.
It would not be arranged for the 1930s that the audio recording was truly accessible when the magnetic tape became a dominant form of recording. In the early 1950s, the magnetic tape was praised as a miracle, allowing radio hosts and musicians to record performances and play them in high quality later.
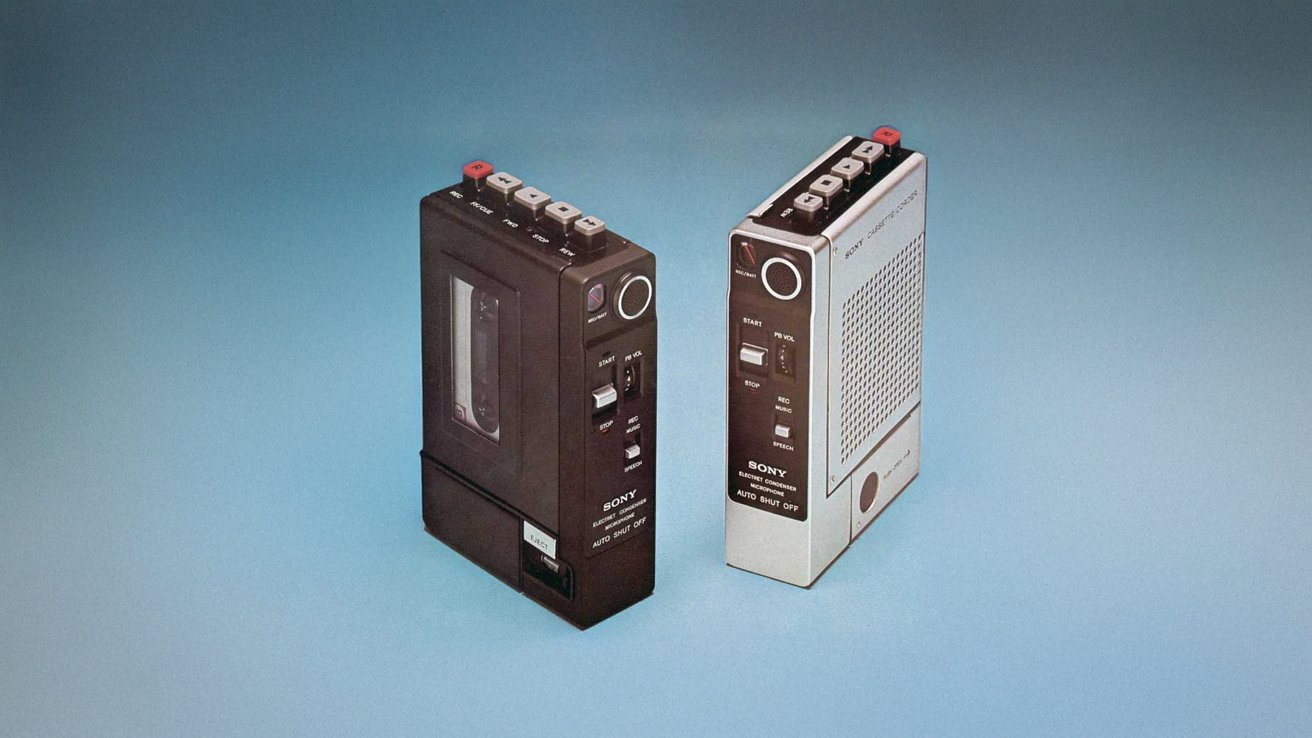
Portable Cartridge Recorder Sony TC-55 | Picture Credit: Hifienengine.com
In the 1970s, many personal sound recorders began to beat the market. For example, Sony released the TC-55 in 1973. It was a highly portable, though somewhat difficult, personal sound sound.
So even though it took about this point to play and fifty years, it is interesting to see all the roads that lead the sound of sound recording on the iPhone – or almost any other Apple device.
Voice record on iPhone
The audio recording on computers has been surrounded for some time, and even digital voice recorders were quite staying.
Yet, sound recording through a smartphone is a significant improvement compared to previous iterations. There is no need to transmit bulky equipment, no tapes to change, and it is much easier to share recordings.
But what Apple would bring to the table was wide availability. When Apple introduced Voice Memos in 2009 as part of iOS 3, he pulled over 14% of the market.
Today, Apple has nearly 57% of the US smartphone market; This means that over half of the US citizens have access to the voice applications note on their iPhone.
It wasn’t UNINE nine years later, with the advent of Macos Mojave, that it jumped on Mac. Since then, however, it has appeared on almost every Apple platform.
Currently, the Voice Memos is supported by iPhone, iPad, Mac, Apple Watch and even Apple Vision Pro. The only Apple platform that does not support Voice Memos is Apple TV.
While the device may vary, voice notes are one of the applications that remain blessed on all platforms.
Recording and playing voice notes
Voice notes will use the built -in microphone of your device to capture the sound unless there is an external microphone.
However, if you connect the device to an external microphone, the application will prefer this microphone. This included all microphones that can be in headphones such as AirPods Max or Earbuds such as AirPods or AirPods Pro.
- OPEN Voice notes
- Tap or click on Recording button
- When you finish, press Recording button again
- You want to play sound, tap or click on Play button
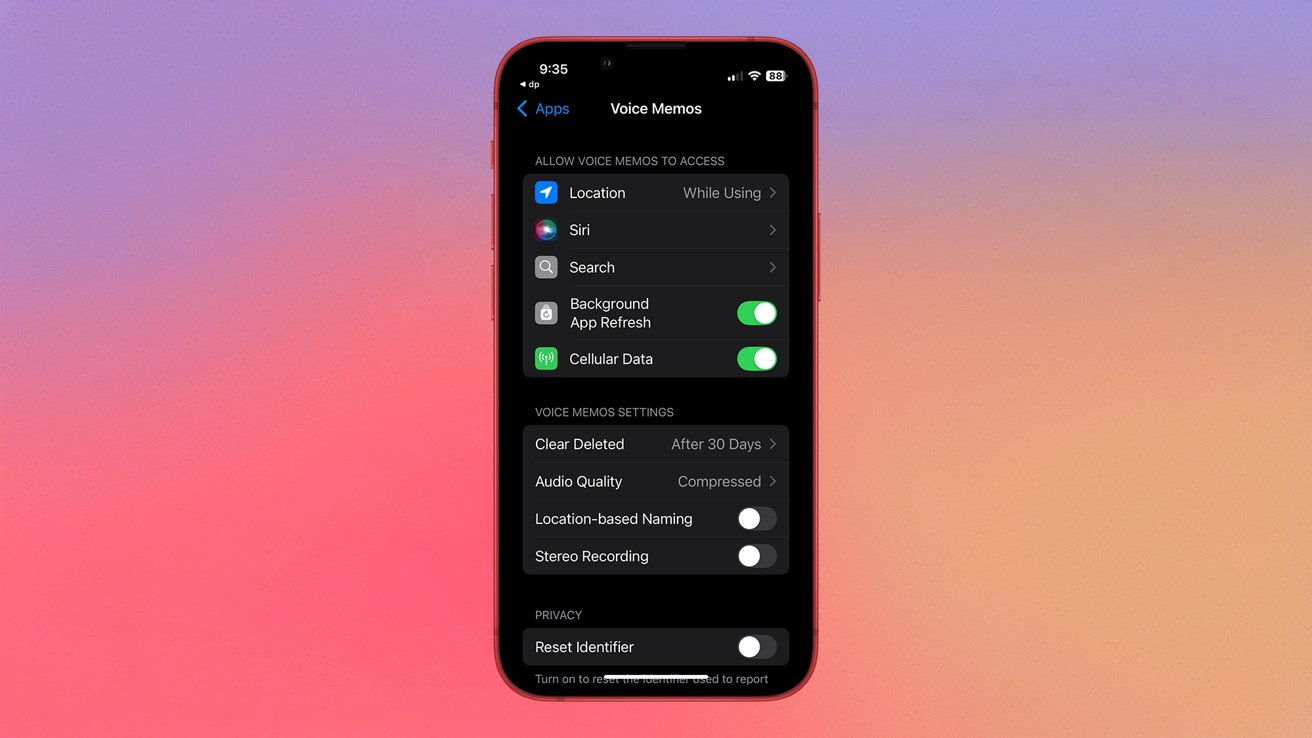
By default, the notes are named geographically. This means that if you notice a voice note in your house, the voice note is likely to be named by your address. If this is a feature you would like to turn off, it’s easy enough.
How to turn off a name based on rental in voice notes on iPhone or iPad
- OPEN Settings
- Scroll down and tap Application
- Scroll down and tap Voice notes
- Switch Naming based on rental
How to turn off a name based on rent in voice notes
How to turn off a name based on rental in voice notes on Mac
- OPEN Voice notes
- Click in the upper panel menu Voice notes
- Click Settings …
- Acheck Rent -based notes
Viewing transcripts in voice notes
Within iOS 18 and MacOS 15 Sequoia, Apple added the ability to automatically rewrite voice notes. Browsing the transcripts is easy, but between macOS and iOS/iPados die a little differently.
Voice notes rewrite views on iPhone
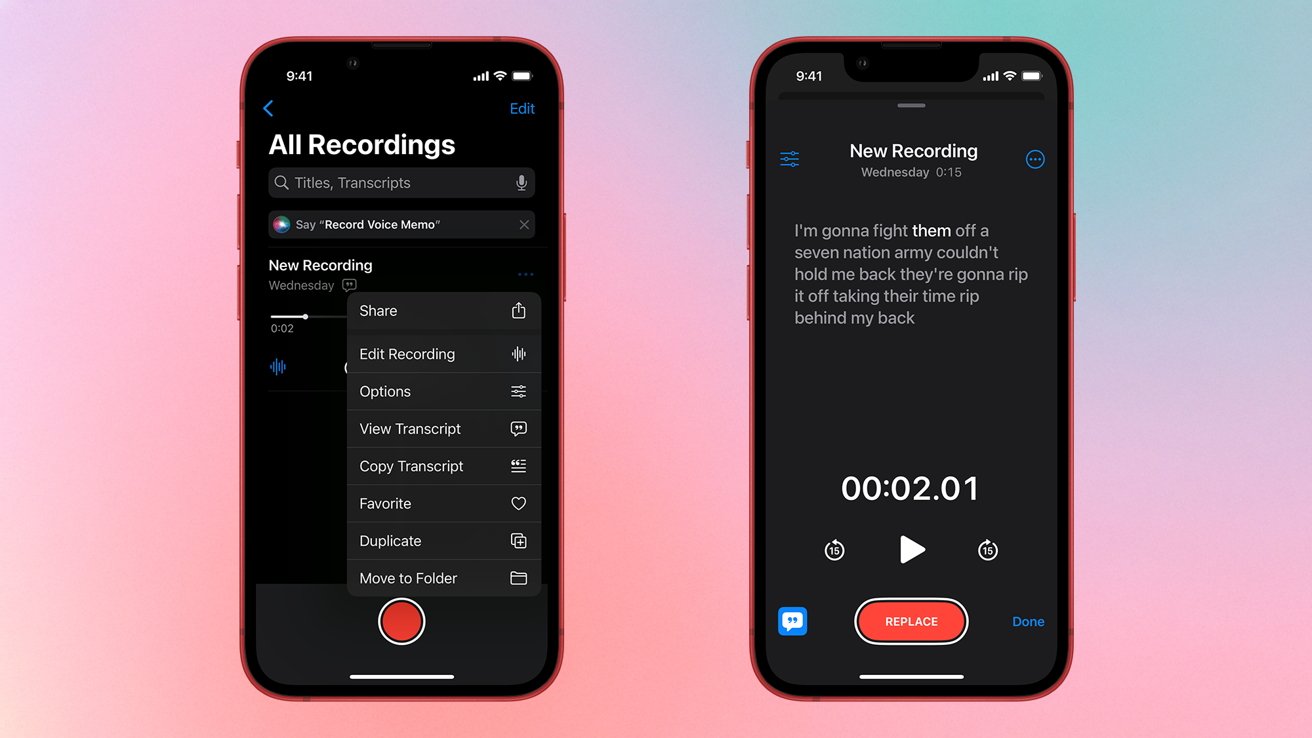
How to view voice remark transcripts on iPhone or iPad
- OPEN Voice notes
- Click on the voice note you would like to see the transcript
- Tap …
- Tap View Transcript gold Copy the transcription
How to view voice remark transcripts on Mac
- OPEN Voice notes
- Click on the voice note you would like to see a transcript
- In the upper right corner of the Voice Memos window, click on Rewriting button
- You can alternatively right -click or Ctrl+click on the transcription and select View Transcript From the drop -down menu
Sharing a voice note
There may be times when you want to share a voice note with a family member, friend or associate. The process extends between the iPhone/iPad and Mac, but is very easy.
How to share a voice note on iPhone and iPad
- Open Voice notes App
- Click on … On the right side of the memora you want to share
- Tap Share
How to share a voice note on Mac
- Open Voice notesApp
- Click on the voice note you want to share
- In the upper right corner of the Voice Memos application click on Share
Laminated voice notes
If you have an iPhone 16 Pro, you can use layered voice notes. Layered voice notes were presented in December 2024, as part of iOS 18.2.
This feature allows users to record a voice track at the top of an existing instant track, all without headphones. Users can intervene and sing via tools and iPhone creates two individual songs – one instrumental and one vocal.
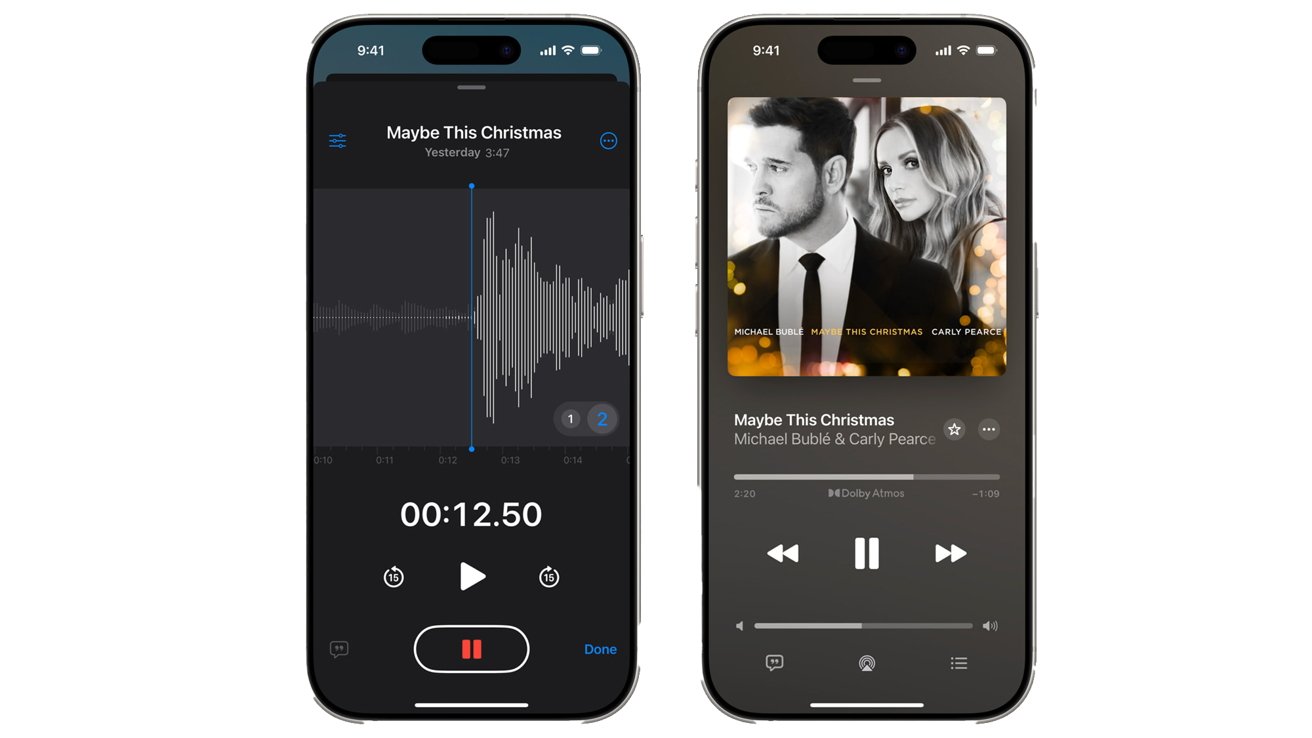
Credit picture: Apple
Later, users can import a layered track into production applications such as Logic Pro.
Recording of layered voice remarks is exclusive to the iPhone 16 Pro and the newer iPhone models.
How to record on a layered voice note on the iPhone
- OPEN Voice notes
- Tap the recording you want to add a second layer
- Tap Wool -shaped icon
- Tap Add button (+)
- Tap A layered recording button You want to record your second layer
Lubrication of voice notes
If you wish to delete – or even restore – voice notes recordings, you can do this by tracking the steps below.
How to delete voice remark recording on iPhone or iPad
- OPEN Voice notes
- In the record you want to delete, click Garbage icon
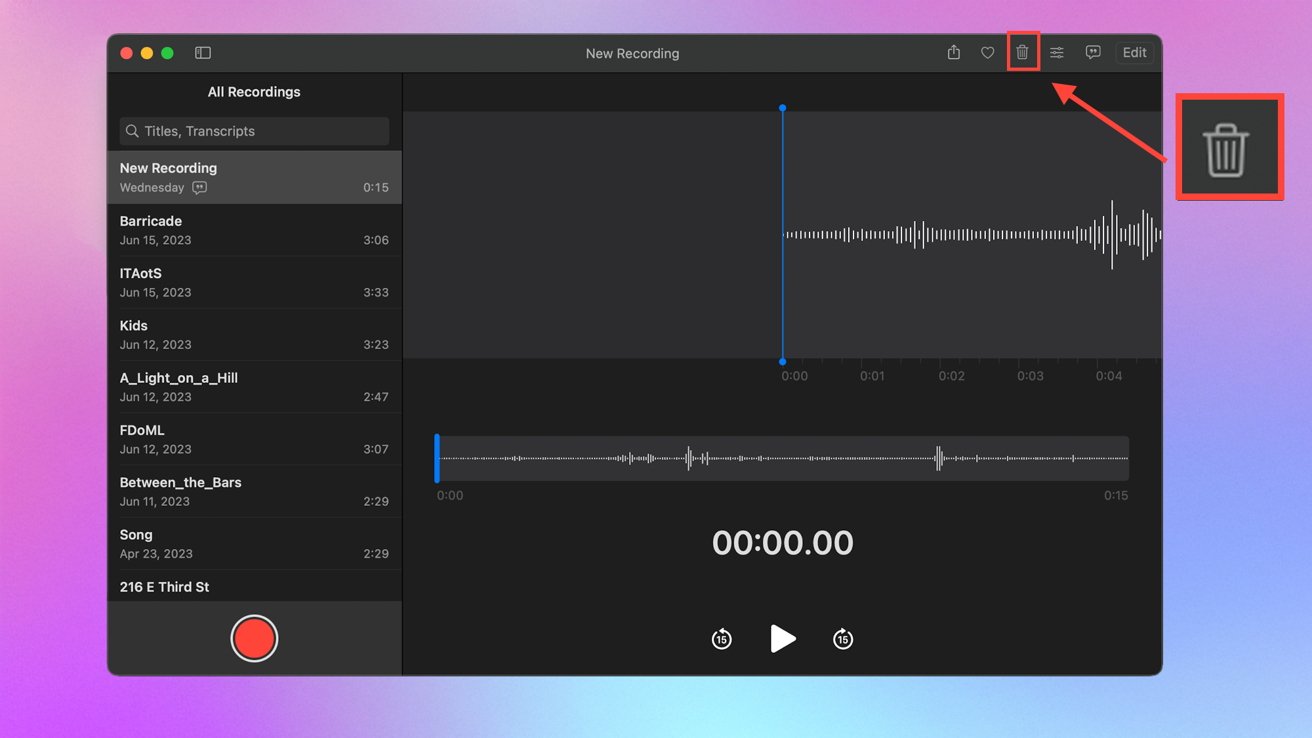
How to delete a recording in voice notes on Mac
How to delete a voice note on Mac
- Open Voice notesApp
- Click on the voice note you want to delete
- In the upper right corner of the Voice Memos window, click on Garbage icon
By default, the deleted notes are stored on your device for 30 days before they are removed. If you want to find deleted voice notes, follow the steps below.
How to Restore Voice Notes on iPhone or iPad
- OPEN Voice notes
- Tap Back button (in the upper left corner of the screen
- Tap Recently deleted
- Click the recording you wish to restore
- Tap Restore
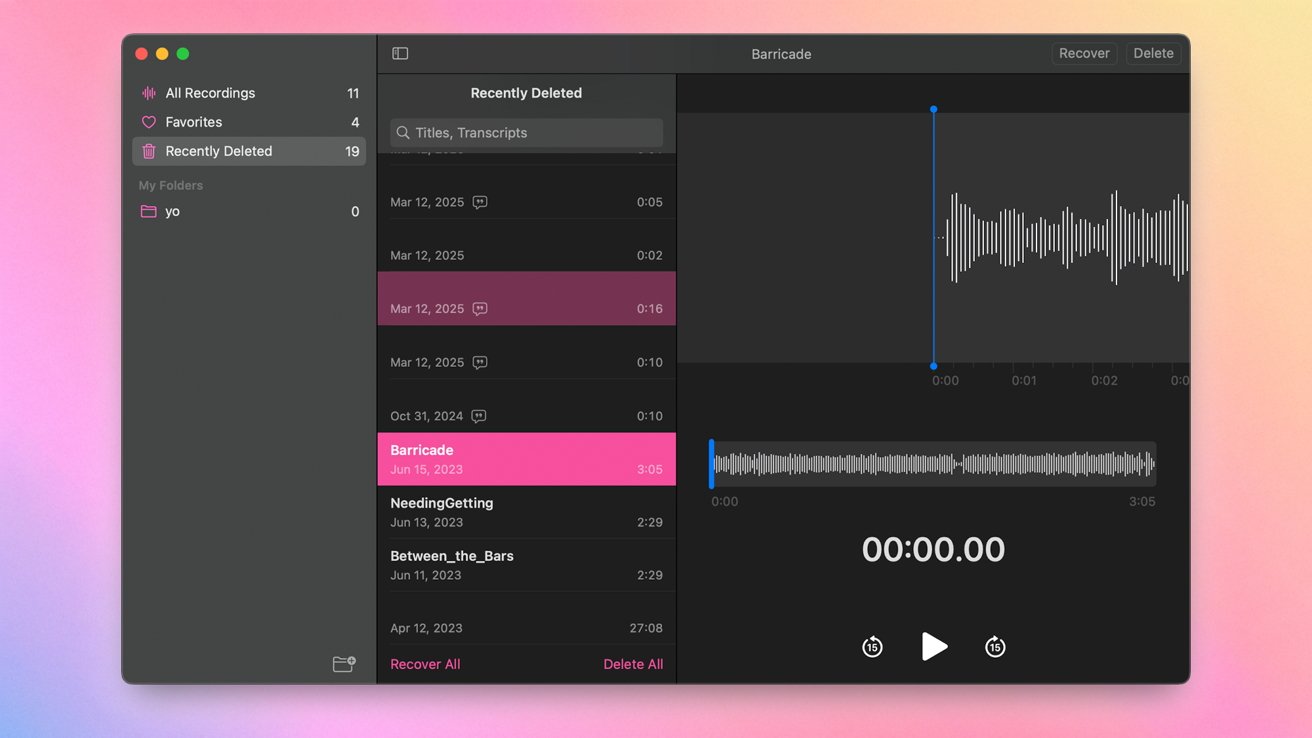
View recently deleted recordings in voice notes
How to Restore Recording Voice Notes on Mac
- OPEN Voice notes
- Click in the upper panel menu Voice notes
- Click View
- Click Side panel
- In the side panel of the Voice Memos window, click Recently deleted
- Click on the recording you want to restore
- In the upper right molding of the Voice Memos Restore
(tagstranslate) Apple